Friday, December 16, 2011
how to grow from bean seeds
I learned that I need to allow the beans to age in the pods for about a week, then dehydrate them by leaving the seeds in the open for a couple of days before soaking them and then planting them in the soil. This will allow more success rate in their germination. If I plant the beans straight from the pod, most of the beans tend to rot away in the moist and wet medium.
Grow from Cuttings
Method :
Select a healthy stem with a growing tip.
Make a slant cut about 1 cm. below a leaf node.
Strip all the leaves away from the stem and leave about 2 to 3 leaves at the growing tip.
Immerse the stem in water and watch the roots grow in about a week's time.
Change the water every two days to prevent mosquito breeding.
Friday, March 18, 2011
CNY acquisitions!
Didn't get to post this earlier, but I got a bunch of orchids for CNY 2011. It's my first try at orchids really, so I'll just have to see whether they flourish or die under my care :-)

GB may recognize his chairs! The orchids are doing fine so far. This photo was taken two weeks after I bought them, but by now it's been a month and a half, and they are still blooming. Quite surprising, cause I thought they would hate this part of the house (which is west-facing).
Not sure about the type of orchids, but they are pretty common here in Singapore:


Monday, March 14, 2011
Pulled my back!
Gardening has pretty much come to a stand still. Pulled my back while doing Garden Makeover Part 3.1, and pretty much had to take it easy. Garden is still in a mess, with unfilled holes... Sigh... Back was recovering for a while until I pulled it again doing WT, so am now very cautious. Will only go back to real physical stuff next week, I think...
Thursday, March 10, 2011
Thalia geniculata - Update
This is what my ZigZag Plant looks like now! Well, at least before I dug up my garden...

It's actually too tall to capture the whole plant in one photo, so here are some close ups:


Love it!

It's actually too tall to capture the whole plant in one photo, so here are some close ups:


Love it!
Thursday, March 3, 2011
Garden Makeover - Part 3.1
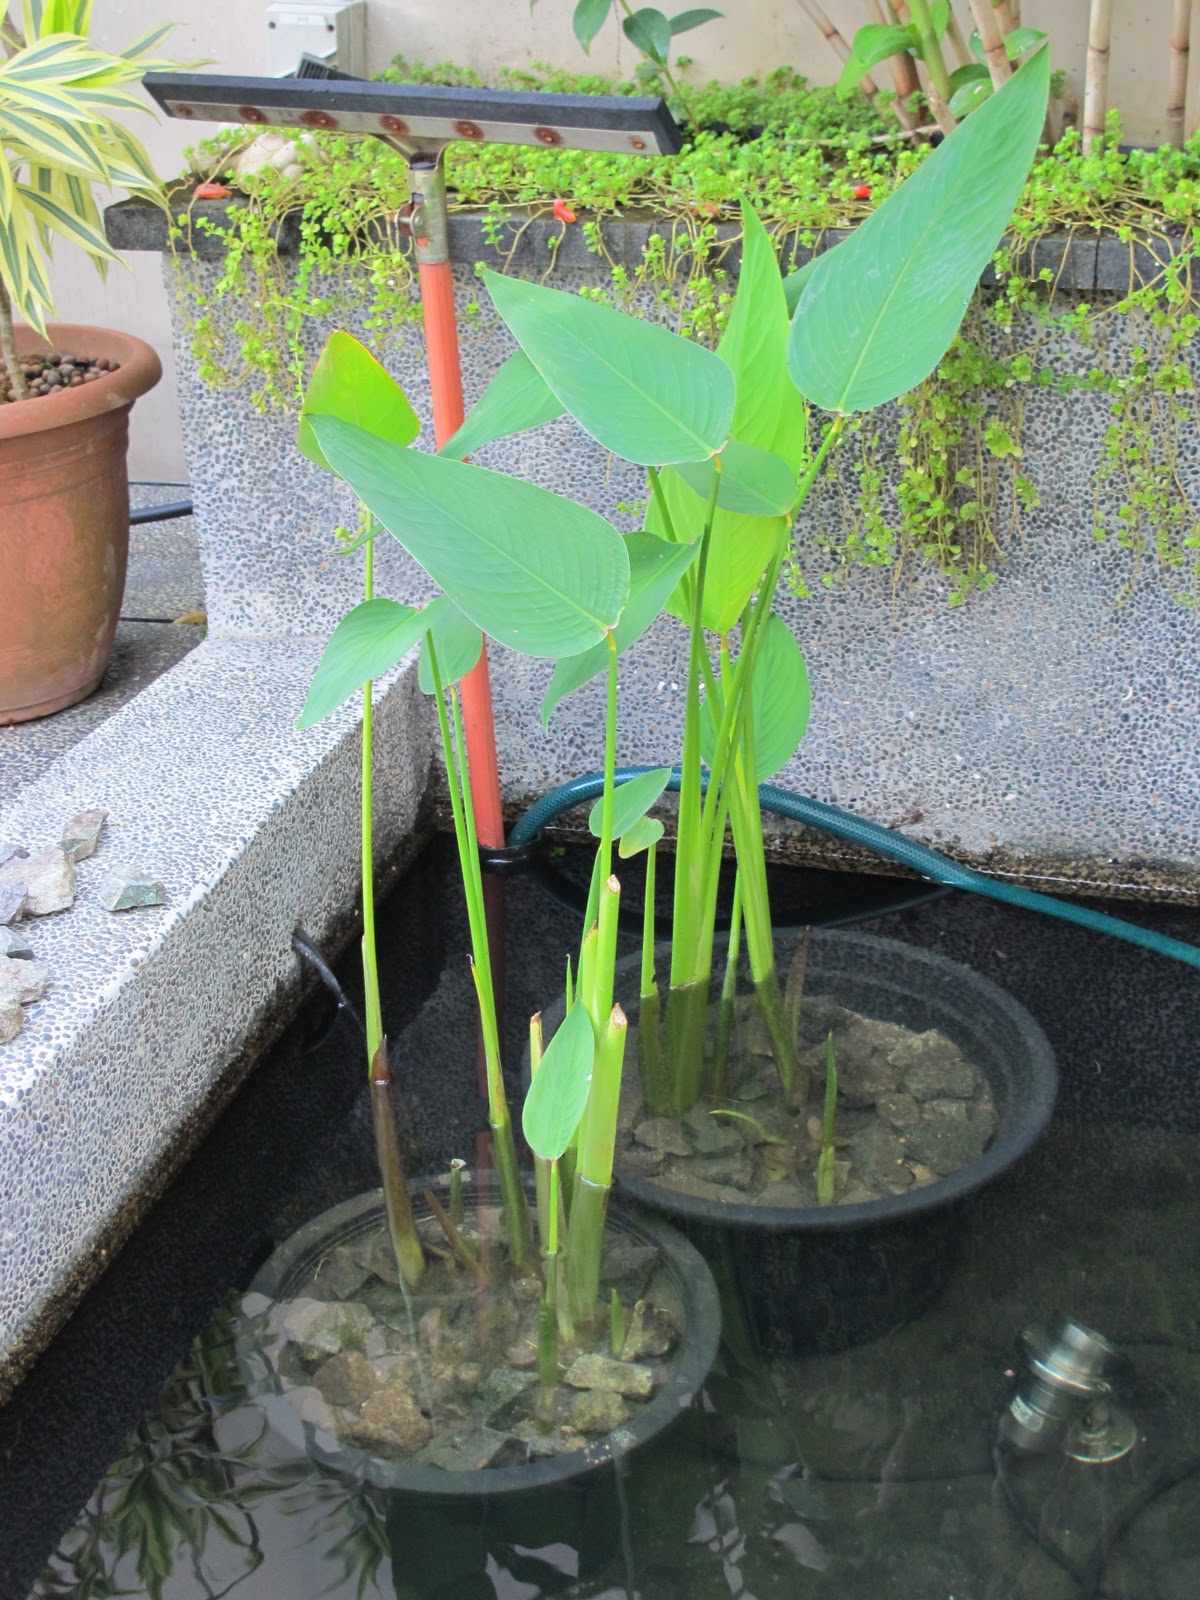
After digging up this corner, I let it "rest" for almost a week. The intention is to determine whether the water logging is really bad (which means the entire garden will have to be dug up) or whether there is a natural water table that my garden is sitting on. During the resting week, there was a huge bout of rain which filled up the hole and then some... it drained back within 24 hours to the level which you saw in my GM Part 3 post. Oh Kay! The diagnosis is that it is a natural water table. I now had a choice of broadening the hole, and create a natural pond, or planting plants that love water.
Since I had a large pond put in at the side of the house when we were building, I thought that another pond would be overkill. (However, it was still very tempting. How many people in Singapore can have a natural pond in their gardens...)
So this is what I did:

I took out a pot of Umbrella Plant (Cyperus Alternifolius) from my pond (it was due to be divided anyway) and stuck it into the ground, and surrounded it with a bunch of Piper Sarmentosum. Let's see if the water-loving plants will (1)survive and (2)help wick away water (3)grow large and gorgeously luscious... Wait for updates in a couple of months...
Monday, February 28, 2011
Garden Makeover - Part 3
Ahhh... My most disastrous corner...

This corner didn't kill any plants... it was my "utility" corner with my auto gate box, water tap, hose etc. But it was the lowest corner of my (sloping) garden, and after digging up my 1st corner (in Garden Makeover - Part 2) I had to check how bad things were here. After all, the grass was almost perpetually wet here. It would squish underfoot everytime I turn on the tap.
I discovered more concrete, more cement wash, a whole layer of anaerobic mud (which smelled really bad), the concrete base that holds up my walls, pvc piping that carried my phone line, scv cable etc, a metal "box" that houses more utility cabling, and a lot of water.

A lot, a lot of water.

Friday, February 25, 2011
Nelumbo nucifera - update
My lotus, which was weak and sharply pruned back in early January, has now recovered and even flowered.

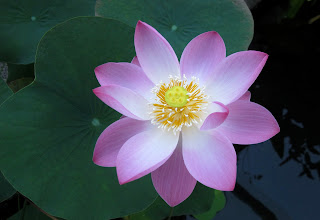


Isn't the flower beautiful? In all it's simplicity...
Tuesday, February 22, 2011
Garden Makeover - Part 2.1 - Cyathea Latebrosa and Caladium Lindenii
I'm trying out a Cyathea Latebrosa, which Gn from my favourite nursery assures me can take full sun. As my garden is fully west facing, I'm a bit apprehensive about this. However, I have lusted after fern trees for many, many years, and as my previous rooftop garden is definitely not conducive for this plant, I gave in to the temptation.

Underneath the Cyathea, I've put in some Caladium Lindenii, which looks pretty good with it's colour offset.
I'll wait for the plants to settle in, and then maybe add different ferns at the base. We'll see.
I'll wait for the plants to settle in, and then maybe add different ferns at the base. We'll see.
Saturday, February 19, 2011
Garden Makeover - Part 2
This corner had out right killed a Red Powderpuff (Callliandra Haematocephala), one of my hubby's favourite plants, and shrivelled a Mulberry bush.
The Red Powderpuff had thrived very well for months after it was planted, and one fine day just shrivelled up and died. The Mulberry used to be in a pot, happily producing fruits, looking as handsome a Mulberry bush can be. I decided to free it from it's pot constraints, and it struggled in the corner. Suffered from almost every problem a Mulberry can: scale, fungal rot, aphids... even the leaves looked like it was contracting something similar to Verticillium Wilt.
So, this is what I did:

I dug it all out.
And I found concrete slab, cement wash, red bricks... All of that came out. I conveniently had an afternoon of rain after the digging and clearing, which had the hole looking like a pond, but it drained and cleared fairly easily.
So, my solution for this corner is a layer of expanded clay (which sits on top of the concrete base that supports the wall, followed by 1:2 pumice and volcanic soil mixture, followed by 1:3 volcanic sand and volcanic soil mixture.
Thursday, February 17, 2011
Garden Makeover - Part 1
The rain in December and January wreaked havoc on my garden plants. The water drainage suspicions that I had for almost a year since I shifted in, became a stark reality.
So, I am now forced to dig up my garden to confirm my suspicions:

Now, I have most of my plants taken out, with dug up holes and "canals" all over...


My Dalbergia Latifolia standing in stark loneliness:


I feel bad giving this tree the chop, so it's a free gift to anyone who wants it. Just bring your changkul and help me dig it up!
Tuesday, February 8, 2011
Belated Gong Xi Fa Cai!
A belated Hoppy Chinese New Ear to everyone!
It's been more than a month since I last blogged, but I had a couple of overseas friends staying with us, and the CNY preparations, celebrations and inebrations...
Just joking ;-)... Time just flies.
Now life is a little bit back to normal, so I'm looking forward to posting on updates for previous posts, and on new acquisitions I made over this period. Also, I'm looking forward to re-modelling my small front lawn, so that should be exciting!
Friday, January 7, 2011
My Old Rooftop - More Photos
Hah! Trying to get my photos organized have unearthed a few more photos of my old rooftop garden. Notice how over-exposed the photos were. This was how strong and bright the sunlight was, even in the morning. I estimate that this was taken around the 9-10am mark. No later than 10.30am.


My old Coral Tree (Erythrinia Fusca), grown in a pot, putting out new growth and flowers after a prune.

My huge Cycad (Cycas Revoluta) that was overshadowing the pond.

The sitting area, seen through another palm (Pinanga Coronata). Yes, many good memories here.

My old staghorn (which was HUGE) and my wild and fern-filled tree fern stem, amidst a large draecana.
This photo does not do the plants justice, and I have no idea why I took it the way I did, but surely there must be a better photo of them somewhere... Ah... to have all my photos unearthed from nooks and crannies, and organized!!! I miss the tree fern stem. Someone gave it to me in early 2000, and my hubby thought I was nuts taking this dead, dirty stem ("rotting" he said) AND hanging it on our roof. I had wanted to tie some ferns on it to make the tree fern stem a literal fern tree, but life has a habit of occupying our time... 6 months later, mother nature had decided to colonize it. Lo and behold! A living fern tree! I counted at least 5-6 different types of ferns, but from this angle you can only see one. Two, if you do an extreme magnification of the photo. Since we were staying very close to the Bukit Timah Nature Reserve, mother nature had probably sent me some spores from there :-)

My palms (Veitchia Merrillii) on the roof, enjoying the sun. Also notice my favourite ponytail plant (Beaucarnea recurvata) [bottom right, second plant].
I bought my ponytail plant as a really tiny plant from Ikea (you know, the type they sell in almost thumb-sized pots? Ok, I exaggerate). That was probably around 1998, give or take a year. This roof photo was taken in 2004, which makes it roughly 6 years old. I still have the plant, which has aged well, and is still growing! Since it is one of my favourite plants that has stayed with me through the years, I'll take an updated photo of it one of these days, and give it a separate post.
Wednesday, January 5, 2011
Nelumbo nucifera

I've been trying to get a lotus for my pond from a year ago, and finally got one 6 months ago. I had specifically wanted a single petalled lotus for its simple beauty, and finally found a pink one at AMK. However, growing it had its ups and downs.
When I got it, it was a small plant in a small pot. I had re-potted it in a nice big pot, and it grew well. New leaves, new flowers..... after it's second flowering, it started to get an infestation of aphids. I was diligent in swiping them off the plant (they dropped into the pond and were promptly gulped up by my goldfish) and this went on for a couple of months after which they plant got weaker and weaker, with smaller leaves, no flowers and finally even the new leaves had brown "varicose veins". I had tried popping a couple of the common fertilizer pellets for water plants but it did not help. The only visible result I had was green algae forming on the stalks of the lotus leaf that was below water level.
In a fit of desperation, I decided to severely prune down the leaves, remove most of the mud/soil in the pot, and put in new clay/mud. So far, it has decided to reward my efforts with new leaf growth (without the varicose veins), but it has all been leaves that float on the water. I will wait and see if it gets strong enough to put up the standing leaves above water, and eventually flower for me again.
Fingers crossed.....
Sunday, January 2, 2011
Thalia geniculata
I just repotted and split one of my favourite water plants, the Thalia Geniculata (or in my vernacular, the "Zig-Zag Flower Plant"). I have had this plant for just coming on to a decade. It has undergone so many re-potting and splits that I have lost track of how many friends and family were beneficiaries of it's growth. I bought it for my old rooftop pond, and now it sits in my garden pond. Although it is classified as a bog plant, it is possible to grow it in a container, as long as it is given enough water.
T. Geniculata is an evergreen, marginal aquatic perennial. I love it's easy maintenance nature, and both it's lovely lance-shaped green leaves and it's small purple flowers that keeps branching out in a "zig-zag" manner. When you have a really mature "zig-zag" flower on top of a long stalk, they look extremely elegant. To keep it tidy, regularly cut off browning leaves and flowers. The photo above does not do it justice, so I will post another after it has recovered from the split and repotting, and is flowering.
A good base of muddy/clayey soil with a fertilizer top-up every 2-3 months makes it a happy plant. Any balanced pelleted slow-release fertilizer is fine. Wrap up in cotton wool or newspaper, and shove it deep into the pot. A full re-potting effort is required once a year, to get rid of dead stems, and when it becomes pot-bound. If you are lazy, it can go on for up to 2 years in the same pot, but it will be a really hard job to re-pot cause the pot will be packed tight. Just split existing plants into different pots, to give it room to grow for the next year.
Tuesday, December 28, 2010
New Pond Renewed
It's been more than a year since I've set up my pond. I must say that the first batch of cubed mud that I had bought and used from a local nursery was very disappointing. I am now forced to re-pot all my water plants. It's way more back-breaking than I remember. And this time, I want to provide a good base for my plants, so I am actually mixing my own humic soil/clayey soil/sand mixture, with a base layer of blood and bone meal, and packets of slow release packets wrapped in small pockets of newspaper. Took me 3 hours yesterday to re-pot 2 large-ish plants and clean out my lily pot. Today, another 4 hours to top up more soil, prune my lotus, top up more soil, dredge out the front of my pond, top up more soil.....
I must say, in spite of the hard work, it's great working in the pond. I'm hip deep in water, splashing around, mud splatters on my hands and clothes, fishes nibbling on my ankles and toes (just like those spa fishes), back aching like mad... but I'm happy.
New pond. New Year.
Happy New Year everybody!
Thursday, December 23, 2010
My Old Rooftop - A Nightly Magical Wonderland
I love my old rooftop, especially at night. Cool and windy on most nights, it played host to our BBQs, drinks nights, the occasional family dinners... Mid-Autumn Mooncake Festival was great, because us adults and kids alike would sit around, lighting endless lanterns and placing them all over the place, creating a really wonderful fairyland effect. But even without the lanterns, the garden was magical. Christmas of course was even better...


And with these memories, I wish you all a Merry Christmas.
Tuesday, December 21, 2010
My Old Rooftop - The Forgotten Difficulties
However, despite all my reminiscing in my previous post, there are clear limitations to a rooftop garden, especially if it's right on top of a building.
Firstly, it is mostly container gardening. This is fine if the pots are small and manageable, and the plants do not suffer too much from being pot constrained. After 5 years of rooftop gardening and transplanting, there is only that big a pot you can buy, and more importantly, that much strength you have to pull root-bound not-so-mini-trees from pots that are larger than the circumference of your arms put together.
Secondly, with full day sun on most parts of the roof plus the accompanying wind (leading to hot and dry conditions) and in an extreme opposite, the full force of a tropical monsoon storm (leading to very wet conditions) the requirement for fertilizing and ironically, water is higher than most gardens. And if you provide good fertilizing and water, the plants grow that much faster with all that sun. And the repotting frequency increases that much more. Towards the end of that 5 years, I was repotting different sections of my roof every alternate weekend. By the time I finished repotting all the plants, It was time to repot again from the first section...
Lastly, if one is unable to repot, due to the limitation of size of container, or even the part of the rooftop where it was designed for direct planting, you can see the palms suffering from inadequate soil in the photo below. I even had a potted Coral Tree that each time I repot, would flower beautifully and grow new branches and leaves, but ultimately ended up looking rather sad and stunted, after it grew beyond a size that I could manage in pots. I know, I know, there are plants that do not grow that big etc etc, but unfortunately, I like tropical lush more than the spindly Aussie semi-desert look, or the Zen architectural more-stones-than-plants minimalist look. Ok, I'm biased, I admit it. I do appreciate them styles, really I do. I can even say they are beautiful in their own special way, but my garden should be lush. Lush, lush, lush...
Sunday, December 19, 2010
My Old Rooftop - I miss it
I know I've a larger house, a "real" garden, and a much larger pond now (and I really love it here)... but I was sorting through old photos, and looking at my previous penthouse rooftop garden, realized how much I miss it.


Ok, it was unbearably hot from 10am through to 6pm, but it was wonderfully cool and fresh in the mornings (my place used to be near the Bukit Timah Nature Reserve), and cool and windy in the evenings after sunset. Sometimes, if we have a party and stay up there till the wee hours of the morning, it was chilly even.
The view was lovely, and uncluttered, and somehow, even though the space really wasn't that large, the fact that the view stretched out with no immediate walls or buildings at eye level made it seem that much larger, that much more spacious:

I love the sink that I'd designed for the outdoor space, and maybe one day, for a new project in my garden, I'd build another like it. For now, memory and photos will have to do:

Here on the right of this photo, is my old "ready-made" pond. It was with this pond that I'd refined my DIY pond skills to the extent that I can design, build and maintain my current large outdoor pond. This includes experimenting in water pump, water flow and (very low maintenance) biological and mechanical filters. Anyways, just to give you an idea, even though this is an outdoor pond with direct sunlight, I only have to clean out the filter twice a year, and suck out stuff from the bottom of the pond once a year. Water was crystal clear throughout. It's a pity that somehow, in my photo-taking, I seem to have omitted taking a direct photo of the pond. Sigh. It was a nice little pond...


Ok, it was unbearably hot from 10am through to 6pm, but it was wonderfully cool and fresh in the mornings (my place used to be near the Bukit Timah Nature Reserve), and cool and windy in the evenings after sunset. Sometimes, if we have a party and stay up there till the wee hours of the morning, it was chilly even.
The view was lovely, and uncluttered, and somehow, even though the space really wasn't that large, the fact that the view stretched out with no immediate walls or buildings at eye level made it seem that much larger, that much more spacious:

I love the sink that I'd designed for the outdoor space, and maybe one day, for a new project in my garden, I'd build another like it. For now, memory and photos will have to do:

Note the sink itself. It's nothing more than a glazed pot!
Here on the right of this photo, is my old "ready-made" pond. It was with this pond that I'd refined my DIY pond skills to the extent that I can design, build and maintain my current large outdoor pond. This includes experimenting in water pump, water flow and (very low maintenance) biological and mechanical filters. Anyways, just to give you an idea, even though this is an outdoor pond with direct sunlight, I only have to clean out the filter twice a year, and suck out stuff from the bottom of the pond once a year. Water was crystal clear throughout. It's a pity that somehow, in my photo-taking, I seem to have omitted taking a direct photo of the pond. Sigh. It was a nice little pond...

Bye, bye, old rooftop...
Friday, December 17, 2010
Memories - Jiaozi and A Capella
A recent post by PetuniaLee reminded me of the days when I was a poor varsity student overseas flatting with a (mainland) Chinese couple. My best memories with them was when they decided to hold their jiaozi parties. There were endless... really ENDLESS... number of jiaozi. Imagine buying a 5kg bag of plain flour just for the jiaozi skin!!! Everyone would be in the kitchen and each person would have certain jiaozi duties, like one would be preparing the meat/vegetable stuffing, another kneading the dough, another rolling out the skin, another wrapping and sealing the jiaozi pouches, and yet another responsible for boiling and dishing out the jiaozi. Every time jiaozi-making had to slowdown because there was a bottle-neck somewhere along the entire process, people would double up in their duties to smoothen the flow.
Thinking back, we had a whole jiaozi production line going!!!
We loved having these jiaozi parties, especially in winter. With all the activities in the kitchen, and the constant steam coming from the pot of boiling water, we didn't even need to turn on any heater to keep warm! Best part was of course having these piping hot jiaozi dunked in a bowl of vinegar/julienned ginger/chilli powder mixture, and squaffing it all down!! And accompanying it would be a cappella Chinese folk songs, sung by my flatmates (really good semi-operatic voices), their friends, and English songs sung by my friends. And we didn't even need alcohol to have a good party :-)
Ahhh, the simpler times..... the best of times.....
Wednesday, December 15, 2010
Sick in bed
Uurgghhh! Sick in bed. Got this strange stomach flu-ey thing that makes me feel distended and wanting to throw up. Haiz..... Had soaked some chopped up coconut husk/coir for my worms, but can't do anything about it right now. They have to stay soaked till I get better.....
Tuesday, December 14, 2010
The Project - Feeding
Waited a full week for the worms to settle down in their new bed before adding stuff to it. A little chopped up watermelon and honeydew rind, which by all accounts are loved by the wormies. Also the shells of 3 eggs that was used to make dinner.
Hope all is well with them, cause I can't see them in the bedding. I tried lifting a few shreds of the newspaper bedding, but I don't see them. I am resisting the urge to disturb the bed (which means disturbing the worms), just to satisfy my curiosity and anxiousness. Patience..... success comes to those who wait.....
Hope all is well with them, cause I can't see them in the bedding. I tried lifting a few shreds of the newspaper bedding, but I don't see them. I am resisting the urge to disturb the bed (which means disturbing the worms), just to satisfy my curiosity and anxiousness. Patience..... success comes to those who wait.....
Sunday, December 12, 2010
Perionyx Excavatus (Malaysian Blue Worm)
The Perionyx Excavatus is what I think I have in my backyard, and is what I have harvested for my wormy condo. It is an epigeic earthworm species. This means that they are found in the upper topsoil layer, which is rich in organic matter. Unlike anecic (upper and lower soil layers) and endogeic (lower soil layer) worms, they do not have permanent burrows, and therefore are most suitable for vermicomposting. They feed primarily on decaying organic matter, and not on soil or mineral matter.
Actually the Perionyx Excavatus is quite beautifully coloured (but I still maintain in an icky wormy sort of way) with an iridescent bluish-purplish sheen. Especially with bright light shining at certain angles. I know that many (especially North American) sites list them as small worms, but at least the ones I've seen can go up to 3 inches. By most accounts, they are capable of fast growth, and very fast reproductive rates. Some sites claim that their reproductive rates are highest among epigeic earthworms suitable for worm farms. By all accounts, they thrive in warmer climates, and become far more temperamental in cooler ones.
Some statistics:
- Ideal temperature range : 21°C to 28°C
- Reproduction rate under ideal conditions: ~ 19-20 young per week
- Time to sexual maturity under ideal conditions: ~ 30-55 days
Thursday, December 9, 2010
The Project - Denuded Backyard
Hahaha, I just happened to look at the patch of soil in my backyard where I had "harvested" my worms for my wormy condo. I didn't realize what a good job I did on removing the earthworms in that patch, cause after the evening/night rain, I can see a good number of mini-humus piles besides worm holes in the soil throughout my backyard, but the patch of soil which I had denuded of earthworms have a smooth, unpock-marked surface. Lesson to learn: One should not be too efficient in removing earthworms out of a single patch of soil. Harvesting should occur more haphazardly over a larger piece of land. Now, I just have to wait for the earthworms to realize that there is unclaimed territory and that they should invade it and make it their own.
Tuesday, December 7, 2010
More worms
Too much rain, and rescued more worms again this morning. They conveniently went into my fledgeling worm farm.....
The Project - Bedding and those who go to bed
I took one full copy of Today newspaper, tore it into strips like so:

Soaked them into a pail of water (which conveniently came from my dehumidifier, so it is chlorine-less), put them into a colander and dripped dry. Checked on it 5 minutes later, when all dripping ceased, but decided that it was still too wet, so proceeded to hand wring-dry the newspaper instead. Then discovered that wet, wrung dried newspaper is a lot lesser than originally thought, so shredded another copy of Today, and literally rinsed and repeat. So this is what I got:
 Since the newspaper was hand-wrung, I had to separate the strips and "fluff" them up to make the bedding comfortable.
Now that it is all ready, who is going to lie on the bed? Hmmm.....
Having been a rescuer of worms, I decided to try getting my own worms out of my garden, instead of buying them from a supplier. Firstly, in the interests of cost, secondly, having seen the size of some of the worms I had rescued, I am convinced that somehow, my backyard seem to have a good solid colony of worms. Further research seems to indicate that I have Perionyx Excavatus (Malaysian Blues). They have a fascinating purplish-bluish sheen (in a icky-yucky sort of way) under a beam of light that fits the description, and are epigeic, as they seem to only like occupying the top 3 inches of my backyard soil. Anyway, I figure that if I got it wrong, and the worms don't work out, I can always go buy "real" worms later.
Anyway, here is what I dug out:

Since in theory, worm populations double every month under ideal conditions, I figured that I would not need to depopulate my backyard in an attempt to fill my worm farm. I got about 30-40 worms, and decided that that will do for starters.
Saturday, December 4, 2010
The Project - Drilling
I had bought 6 of the stackable containers. With all the research I did on the internet, good ventilation was a requirement, not to mention having enough holes for the worms to pass through from one container to the next. So... I drilled, and drilled and drilled... 9x6 holes per container plus 2 superlarge holes at the ends... plus one hole for a tap... that adds up to 225 holes at one go. Wow. Lucky I did not calculate this at the start, cause its actually more daunting when I am writing this than when I only had The Project in my head.
Anyways, this is what is looks like:

The 2 round net-like things at the end is an improvisation. I could not find the white round, plastic ventilation discs that are frequently found at the back of shoe cabinets, so I got sink drainers instead, and siliconed then onto the container.
This is a closer look at it:

And here it everything nicely stacked up:

Wednesday, December 1, 2010
The Project - Hunting
Hunting for the ideal container for The Project proved a little tougher than I had anticipated. I had thought that a simple trip down to Ikea would provide lots of choice, but little did I know.....
My requirement for a cost effective, stackable container which is worm (escape artist) proof, proved challenging. My hunt went through a spectrum of shops as diverse as Ikea to mom-and-pop sundry shops to hypermarkets, and finally ended up in Toa Payoh Industrial Park, at the Toyogo outlet.
Finally:

Tada!
Tuesday, November 30, 2010
Birth of The Project
I have been toying with the idea of vermicomposting for a long time, but hadn't cooked up enough courage to deal with worms until recently. But after my experience as a (reluctant) worm rescuer, the idea of a vermi-compost bin grew and gnawed (now why did I use this word) within me. I had read and seen of home-made compost bins (too small) and commercial compost bins (too expensive). I toyed with getting semi-commercial ones. You know, the ones that are designed and modified at home, but sold with a profit margin. Somehow I could not get used to the idea of sticking my hands into the bottom of a rubbish bin full of compost, not knowing whether any worms are going to fall onto my hands. I tried to sell myself the idea, even consulting members of GCS who have bought that design, but could not get over the goosebumps. Days grew into weeks, weeks into months. And somehow, it all resulted in The Project.
Friday, November 26, 2010
Worms
With the huge amount of rain that we have been getting here in the central-north area, my earthworms are literally getting washed out of the ground and planters. In the mornings I see them hiding below my garden slippers and in leftover wet patches on the ground. Having seen their predecessors in dried format (coming back after work), I was moved to "rescue" them. With trowels in both hands, I try to gently pick them up and drop them back to soil safety. After much trial and error (and half-shrieks, hops, skips and goose-pimples on my side; not to mention lots of dodging, speed crawling, wriggling, writhing, and the occasional mash-up on the worms' side), I now am semi-comfortable with them. Semi. Really.
Subscribe to:
Posts (Atom)